Performance Hack #012 : Drawings : Projected Dimensions Vs True Dimensions
Overall Concept
Dimensional precision is very important for any project. Let’s say that the dimensions on my views are not coming out to the correct projected value, what could be wrong? In this tutorial we are going to discuss: How we can get correct dimensions value, and Which setting to apply when.
Drawing Dimension Types in SolidWorks
Dimensions in drawings are either True Dimensions or Projected Dimensions.
• Projected dimensions, as the name implies, is the absolute distance between the two entities projected into the drawing plane, aka 2D Dimensions.
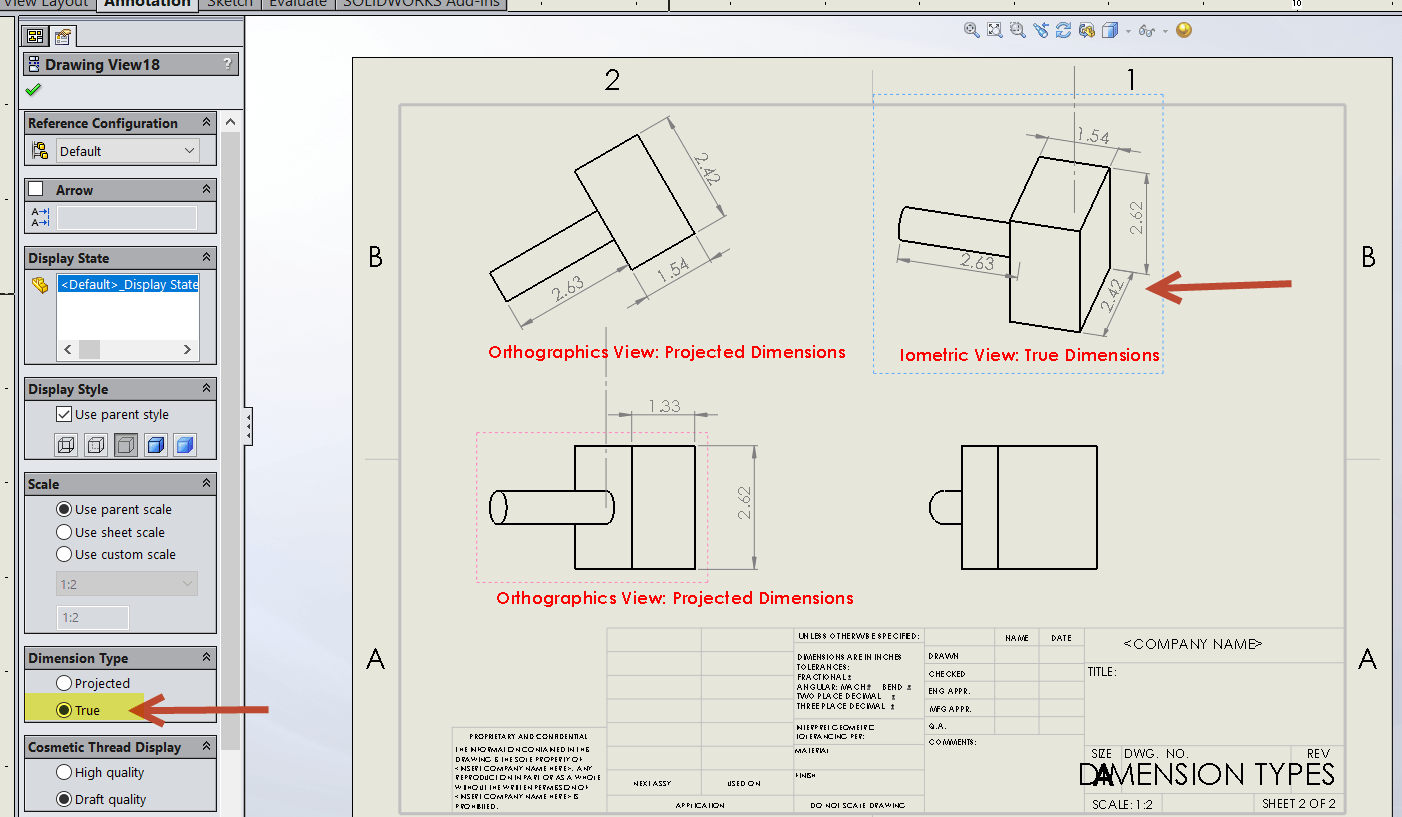
• True Dimensions are considered to be “accurate model values”.
• SOLIDWORKS specifies “Projected” type dimensions for standard and custom orthogonal views and “True” type dimensions for isometric, dimetric, and trimetric views by default.
• If you create a projected or auxiliary view from a view, the new view uses Projected type dimensions, even if the original view used True type dimensions.
You would typically only use:
• Projected dimensions on an orthographic view
• True dimensions on an isometric view.
• If there are two dimensions to the same entities and they are different, the likelihood is that one view has “True” dimensions and the other “Projected” dimensions. You will need to critically assess which dimension you are looking for, and you may have to open up the part to ‘actually’ confirm.
Projected and True Dimension Sample file:
1. Please open attached sample file “Dimension_Type.sldprt”.
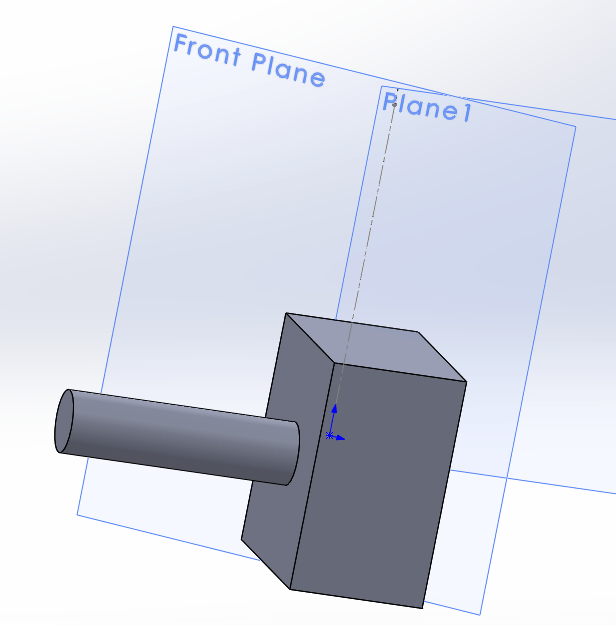
2. Look at the way the part was created; this was done using an inserted plane referenced at an angle 25 Deg from the default front plane and the vertical axis. This sort of set-up can happen quite frequently if a part was built using the “Top-Down” design methodology and has multiple in-context references.
3. Now, in this sample file, we see that the base feature “Boss-Extrude1’ is built on plane 1 and the rest of the features are based on this initial sketch and plane.
When to use Projected dimensions:
4. Open attached drawing sample “Dimension_Types.slddrw”
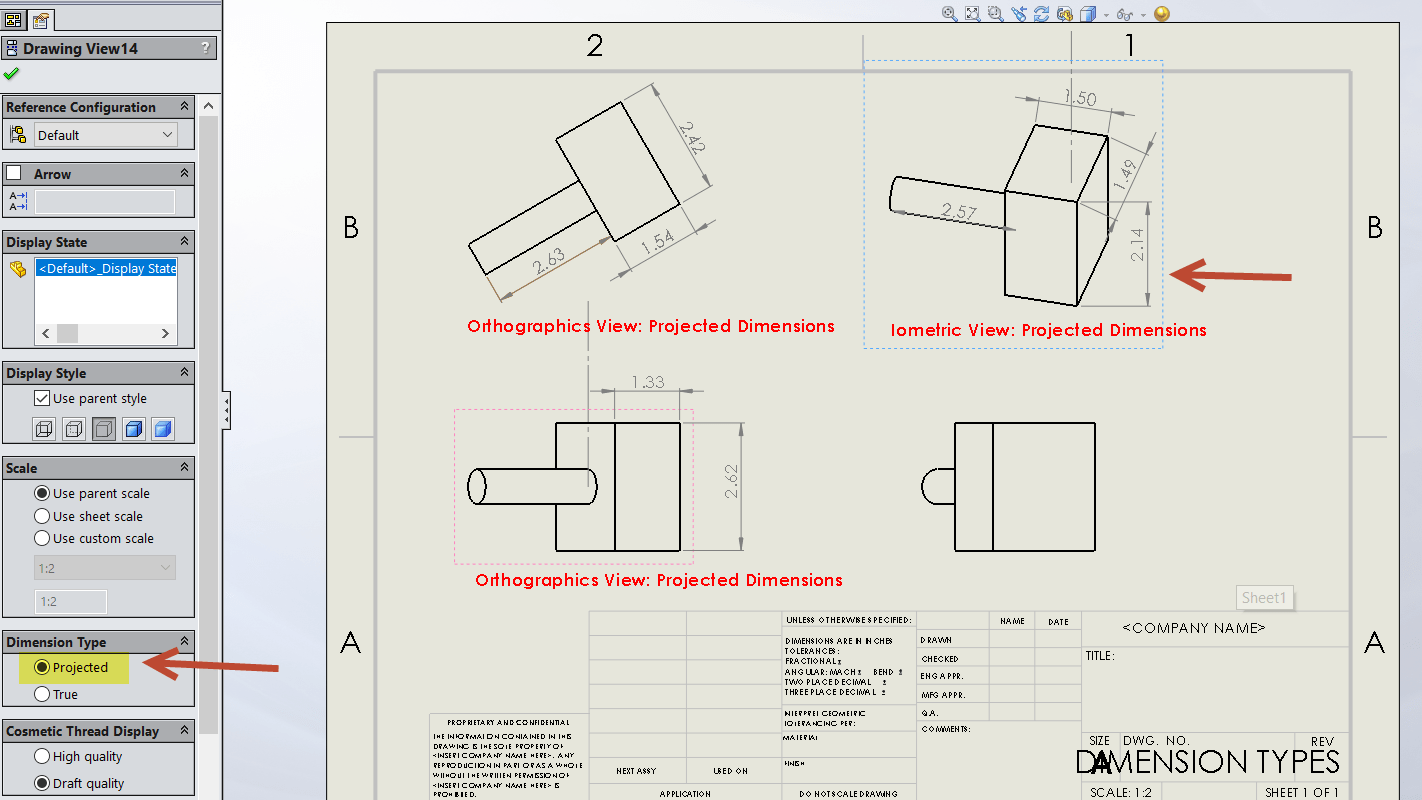
5. As you can see the dimensions are coming out wrong for the isometric view.
6. To correct this problem, left mouse button click on a drawing view to select it. At the bottom of the PropertyManager under Dimension Type select True Type.

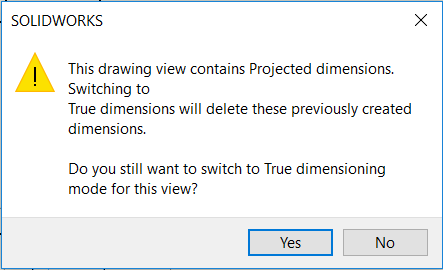
7. Whenever you switch between True or Projected, the following message will display. If you hit “yes”, all the dimensions will disappear for that view, and you must re-apply the dimensions as necessary.
• This is also why you should confirm the accuracy of dimensions as early as possible, before too much work has been applied to the drawing. If you accidentally hit the wrong button, just select “No” and it will maintain the type, (and dimensions).
Extension lines are not aligned, and dimensions incorrect?
• When you are trying to dimension the edges of a drawing and the leader line does propagate at an angle and is not parallel to the selected edges? The reason behind this is dimension type.
o The dimensions are most likely projected dimensions and therefore the behavior is expected. In order to add the dimension parallel to the edges please follow these steps:
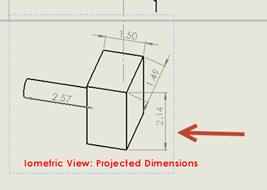
1. Click on the drawing view
2. Change Dimension Type to ‘True’ in the PropertyManager
Rapid Dimension Selector:
• Rapid dimension manipulator not appear for all views, even though “Rapid Dimensioning” option is selected.

• This can occur if the user has selected True Dimension type when the drawing view was inserted. Rapid dimension manipulator only works for projected dimensions and this is the intended behavior. Please select ‘Projected dimensions’ for a drawing view if the Rapid dimension manipulator is needed.



Leave a Reply
Want to join the discussion?Feel free to contribute!